I Upgraded My Amiga’s Power Connector with a Magnetic USB‑C Style Hack (and a Few Soldering Gremlins)
This started as a simple “what if?” after I noticed my MacBook Pro’s magnetic power connector. You know the feeling: no fumbling, no wiggling, just click—and the power’s connected. Naturally, I thought, “Could an Amiga get the same quality-of-life glow-up?” And because retro projects are basically 50% engineering and 50% accidental slapstick, I also decided it would be fun to find out whether it was even possible.
The Juice Box: the power supply I didn’t expect to love this much
Before I touch the magnetic connector itself, I need to set the stage: my “Juice Box” power supply has been a bigger success than I ever imagined. People have been using it to power more than just Amigas—like an Amstrad CPC—and the key detail is that it’s versatile: it can provide steady clean voltages for machines that need 5, -12, or 12 V.
It’s powered via USB-C and outputs consistent voltage to whatever I connect. So for me, the big idea wasn’t changing the power supply—it was modernizing how the Amiga connects to it.
Borrowing a trick from my MacBook Pro
My MacBook Pro uses a magnetic connector, which makes attaching and detaching power delightfully easy. No fumbling about. No pressure on fragile bits. Just… modern convenience, in a way that feels almost too smooth for my usual retro maintenance routine.
That’s the thought that kicked off the whole challenge: can I make an Amiga connector that’s just as convenient—without breaking anything?
Finding the magnetic connector (and planning the “domino pin” parody)
I began by searching for suitable magnetic connectors. I found some on AliExpress, and I liked them because they use a domino pin arrangement that mirrors the original Amiga power connector. In other words: it wasn’t just functional—it was a little bit of retro parody, like the connector was winking at the original design while still trying to be helpful.
Once I had the magnetic connector, the rest of the solution was mainly about connecting it properly to the Amiga’s original power input.
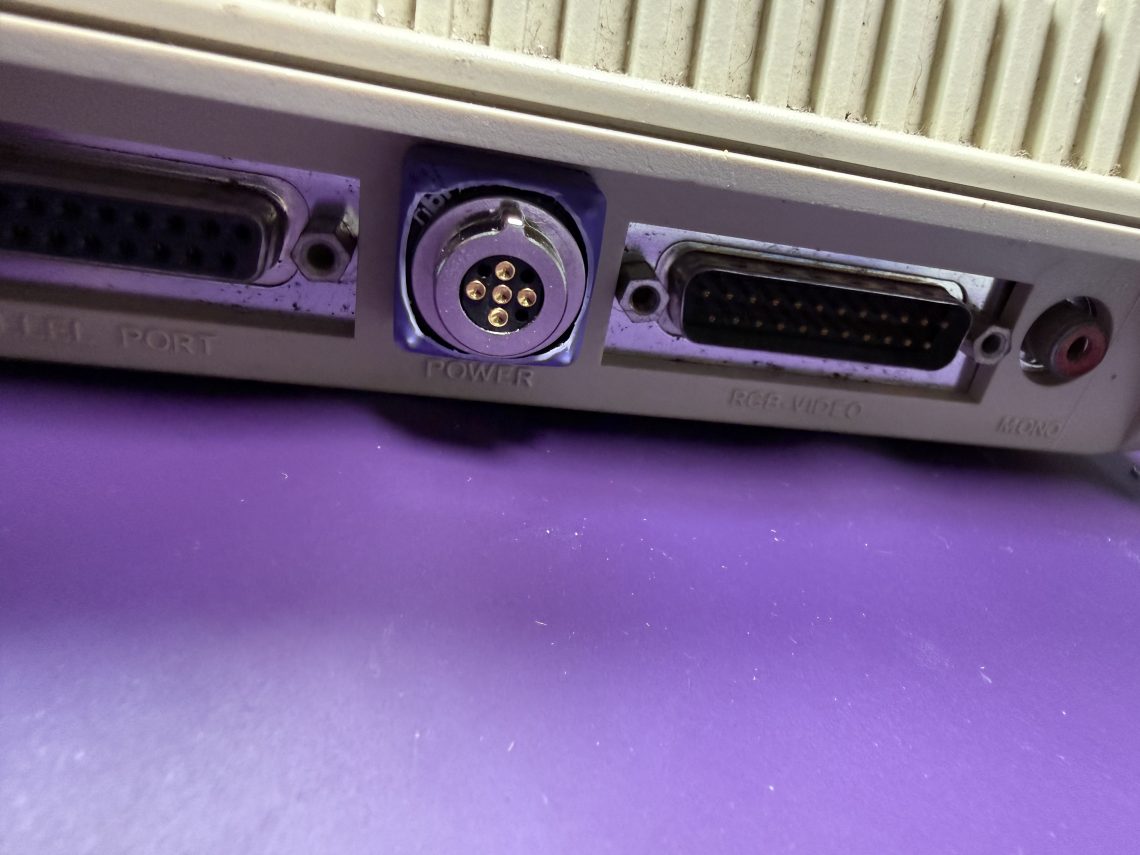
The Amiga part: matching the 5-pin DIN “domino” layout
The Amiga uses a 5-pin DIN connector with pins arranged in a domino pattern. I managed to find pins on AliExpress that were close enough that I thought they’d work.
I want to be honest here: I wasn’t doing this from a position of “certain victory.” It was more like, “These look like they might fit—let’s design and verify.” That uncertainty is half the fun of hardware hacking, and the other half is… soldering.
I designed a stack of PCBs in KiCad
With the magnetic connector and pins chosen, I designed a stack of PCBs so everything would line up the right way and connect cleanly. This is where I put everything into KiCad, then sent the files off to get the boards manufactured.
Assembly time: the pins were a good fit (mostly)
When the parts arrived, I assembled the board stack. The pins turned out to be a good fit, which immediately lowered my stress level by about 30%—a rare win.
To make assembly easier and keep everything aligned while soldering, I used the socket from an old Omega. That helped keep the pins straight while I worked.
Magnet + soldering iron = tiny chaos
Here’s one downside I discovered the hard way: magnetic connectors are, well… magnetic. And my soldering iron is made out of fairly ferrous material.
During soldering, I found I had to hold things in place while soldering, otherwise the magnetic parts would jump off and catch themselves on the soldering iron. Retro electronics really is just physics with better branding.
My “easy to assemble” orientation plan… worked until it didn’t
In the design, I added orientation helpers: I put a square and a circle on each PCB that would face each other when stacked, and I also included a notch at the top to mirror the original DIN notch. Plus, I made it so the pieces would be harder to assemble wrong—at least in theory.
And then, of course, I assembled one part rotated 180° because I didn’t get the memo from my own design. I had to desolder it and put it on the right way.
I won’t bore you with the full desolder process, but the highlights are: I used heat shrink to cover it up afterward. It’s functional—just not winning any interior design awards. But it does the job, and honestly, most of my electronics don’t need to look like museum pieces.
Putting it together: now the Amiga can “click” into power
Once everything was assembled and connected to the Juice Box, it was finally time to test it with an actual Amiga.
I was genuinely pleased with how it turned out. The connector ended up being fairly secure, and it works perfectly.
The one practical tweak I can see: in my specific setup, it could benefit from a slightly longer, more flexible cable coming from the Juice Box. But that’s a comfort improvement, not a reliability issue.
Why I think I’d do this to most of my Amigas
After testing, I’d absolutely consider doing this upgrade to most of my Amigas. The magnetic connector sits in the back, and it makes swapping power supplies between machines much easier. Most importantly, it avoids the “fumble about” motion that can put extra pressure on internal PCB power connectors—the very parts that have already taken years of abuse.
In short: it’s simpler on the user, and gentler on the hardware. A small mechanical change with a big quality-of-life payoff.
Next up: USB‑C power solutions for other retro machines
As a bonus, I’m also working on dedicated USB‑C power solutions for other computers like the Atari ST and the FM and E series. That work is in early prototype stages, and I’ve already run into some minor hiccups—so I’m expecting something functional soon, but I’m not pretending it’s already done.
Takeaway: retro upgrades are best when they save your connectors (and your sanity)
I went into this hoping it was possible—and it turned out to be. The magnetic connector idea delivered exactly what I wanted: easy, secure power connection with less fiddling. And along the way, I learned a couple things: magnets will “help” you whether you want help or not, and I should probably trust my designs… even when I’m assembling them at 1 a.m. with soldering fumes in my future.
